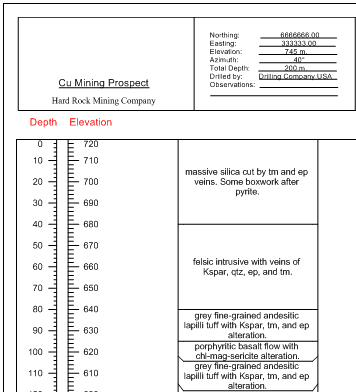
Click the Log | Create Log | Depth command to create a depth log. The depth log is used as a scale to display the depth or elevation of the data in the borehole view or cross section view.
Depth logs can display depth or elevation.
Depth logs use depth or interval data tables. In the data table, there are two required columns. The required columns are Hole ID and Depth. The depth log displays from the minimum depth value to them maximum depth value listed in the table.
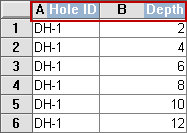
The Hole ID, and Depth are
required for a depth log.
To create a depth log:
Click the Log | Create Log | Depth command.
Click inside the log pane where you want the depth log to appear. If other logs exist in the current view window, the depth log is created.
If a depth log is the first log item created in this view window, in the Open dialog, click on the data file. If the data was already opened, click on the table name in the Use Current Table section. Click Open.
Set the data importing options in the Specify Worksheet Column Definitions dialog, if necessary, and click Next.
Finish the importing of data in the Specify Data Type and Column Positions dialog and click Finish.
The depth log appears in the view window.
If you are in active mode a depth log is created using the default properties. If you are in design mode, a depth log graphic is displayed as a place holder after step 2.
To change the features of a depth log, including the depth orientation, units, and tick interval properties, click on the depth log in the Object Manager or view window. The properties are listed in the Property Manager.
The following tabs are listed in the Property Manager:
See Also