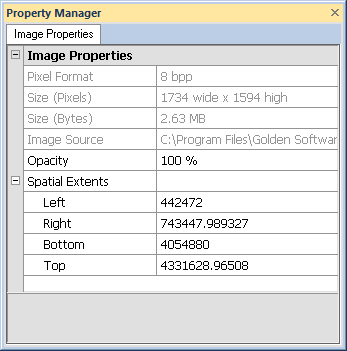
Click on an image that has been imported to select it. The Property Manager displays the Image Properties.

Click on the image to see image
properties in the Property Manager.
The Pixel Format lists the type of image that is selected. This is a read-only option.
The Size (Pixels) lists the size in pixels of the currently selected image. This is a read-only option. To change the size, use a photo-editing program to resample the file and reimport the saved file.
The Size (Bytes) lists the size in bytes of the currently selected image. This is a read-only option. This is an indication of the amount of memory needed to display the image in Strater. To change the size, use a photo-editing program to resample the file and reimport the saved file.
The Image Source lists the path and file name of the image that is currently selected. This is a read-only option.
The Opacity indicates the amount of transparency on the image. The values can range between 0% (fully transparent) to 100% (fully opaque). A partially transparent image can display objects behind it. To change the opacity, highlight the existing value and type a new value. Press ENTER on the keyboard to make the change. Alternatively, click the  button to increase or decrease the level of opacity.
The Left, Right, Bottom, and Top values in the Spatial Extents section display the current extents of the image. Enter a new value into the Left, Right, Bottom, and Top boxes to change the image extents.
Changing the Spatial Extents does not update the map Limits or Scale. After changing the Spatial Extents, you may need to click on the Map object and change the options on the Limits and Scale pages in the Property Manager. After changing the Spatial Extents, it may also be necessary to change the Coordinate System for the base layer.
See Also