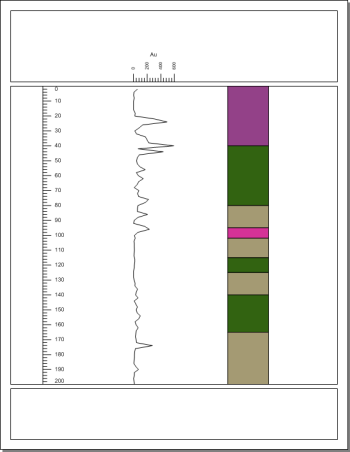
Zone bar logs can display a variety of well log information, such as lithology or layer information. Zone bar logs include two columns of depth data, normally labeled as From and To. Because of this, each row contains data that represents conditions in a depth range.
To create a zone bar log:
Click the Log | Create Log Zone Bar command.
Click in the log pane to the right of the line/symbol log.
In the Open dialog, select the Tutorial 1.xls file from the Samples folder and click Open.
In the XLS Import Options dialog, select the Lithology sheet and click OK.
In the Specify Worksheet Column Definitions dialog, check the box next to Specify Column Header Row option to set the contents of row 1 as the header row.
Click Next.
In the Specify Data Type and Column Positions dialog, verify that Hole ID, From, and To have the appropriate columns selected. The rest of the columns are not mapped to one of the remaining predefined columns but will be imported into the table.
Set Hole ID to the Hole ID column.
Set From to the From column.
Set To to the To column.
Set Hole Inclination and Hole Azimuth to [Unspecified].
Set Data to [Auto].
Click Finish.
The zone bar log is created with the default properties. An interval table named Lithology is created with the data from the selected sheet.

The zone bar is added to the existing borehole view.
Back to Creating a Line/Symbol Log
Next to Lesson 3 - Changing Properties