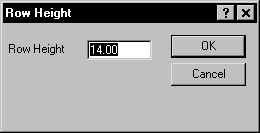
You can change row height of selected cells in a data table by clicking the Data | Format | Row Height command or by using the mouse to size the row. The Excel XLS, XLSX, or SYLK SLK file format must be used to save the row height and numeric format information with the file since ASCII file formats (.CSV, .TXT, .DAT, .BNA, .BLN) do not preserve file format information.
To set row heights or to hide rows, select either the entire row or individual cells within the rows and select Data | Format | Row Height. Enter the height, measured in pixels, for the selected row or cells in the Row Height field. Rows can range from zero to 512 pixels in height. A value of zero (0) hides the row.

Change the row height by selecting rows,
clicking the Data | Format | Row Height command, and
entering a number into the Row Height dialog.
Row height can also be changed using the mouse. When the cursor is moved
to the line that defines the lower boundary of the row header, the cursor
changes to a line with two arrows  . Press
and hold the left mouse button, move the cursor up or down to change the
height of the row.
You can hide a row by moving the cursor up until the next dividing line is reached. In the Row Height dialog, a Row Height value of zero (0) hides the row.
To display hidden rows, press and hold the left mouse button at the bottom of the hidden row and move the cursor down to stretch the row height.
See Also