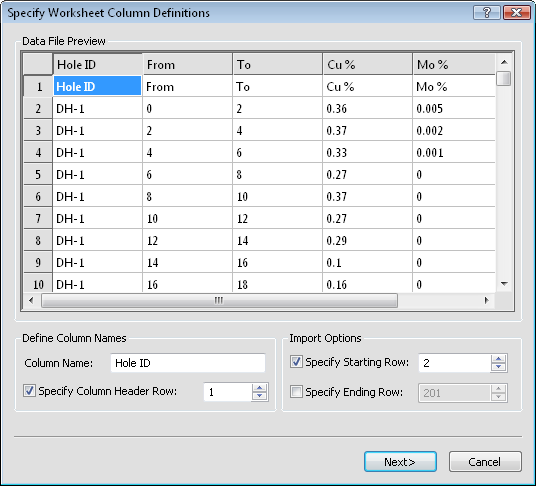
The Specify Worksheet Column Definitions dialog is used to select the column names and number of rows to import.

Set the rows to import and the header row in the Specify Worksheet Column Definitions dialog.
The Data File Preview section displays the contents of the data being imported. The Data File Preview box is also used in manually defining column names.
When importing data, you have the option of manually defining column names or using the column headers (if any) in a row. If the column names match the default Strater table column names, they are automatically matched in the next Specify Data Type and Column Positions dialog.
To manually define column names:
Click in a cell in the Data File Preview section.
Type the desired column name in the box next to the Column Name option.
Click in a cell in another column. Notice that the previously selected column has the new name listed.
Type the desired column name in the Column Name option.
Repeat until all of the columns are named.
To automatically define column names, check the box next
to the Specify Column Header Row option. To change the row to
use for the header names, highlight the existing row number and type the
row number containing the header names. Alternatively, click the  to increase or decrease the row.
When importing data, you can import all rows or limit the rows to a specified range. By default, all rows are imported.
To limit the row range:
Check the box to the left of the Specify Starting Row option.
In the box to the right of Specify
Starting Row, highlight the existing row number and type the
row number that contains the first row to import. Alternatively, click
the  button to increase or decrease the starting row.
Check the box to the left of the Specify Ending Row option.
In
the box to the right of Specify Ending Row, highlight the
existing row number and type the row number that contains the last
row to import. Alternatively, click the  button
to increase or decrease the ending row.
See Also