To edit the legend, click once on the legend to select it in either the view window or the Object Manager. Once the legend is selected, all the properties of the legend are available in the Property Manager.
To change the sample layout:
Click on the Legend tab in the Property Manager.
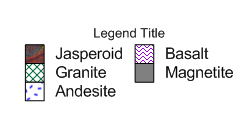
The Number of columns contains the number of columns that should appear in the legend. Highlight the 1 and type 2. Press ENTER on the keyboard to make the change. Two separate columns appear.
The Sample options describe what should appear for each sample. Click on Both and select Rectangle from the list. The symbols are removed and only the filled rectangles remain.
To remove the spaces between rows of the legend, uncheck the Space Between samples option.
The legend appears with two columns
without spaces between rows.
To change the title of the legend:
To change the title, click on the Label tab in the Property Manager.
Expand the Legend
Title section by clicking the  next to
Legend Title.
next to
Legend Title.
Expand the Text
Properties section by clicking the next
to Text Properties.
Click the  button
in the Text field.
button
in the Text field.
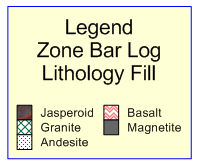
In the Text Editor, type the text that should appear, such as:

Type the text in the Text Editor that should appear as the legend title.
Click OK in the Text Editor and the legend title appears.
To change the size of all of the text
in the title, open the Font Properties
section by clicking the next to Font Properties.
Highlight the 10 next to Size (points) and type 18.
Press ENTER on the keyboard to make the change.
Legends can also include a frame with line and fill properties. A frame line must be specified before any fill properties will be displayed. To set the line and fill style for the area behind the samples and text:
Click on the Line tab.
Next to Frame Style, click the word None and select Rectangle or Rounded Rectangle from the list. The Rounded Rectangle option rounds the corners of the rectangle.
Click
the  next to Line
Properties to open the frame line properties.
next to Line
Properties to open the frame line properties.
Increase the line thickness by highlighting the value next to Width and typing a new value, such as 0.02.
Change the line color by clicking the color next to Color and selecting a different color from the palette.
Click on the Fill tab.
Click
the next to Fill
Properties to open the frame fill properties.
To fill the area, click on the None next to Style and select the desired fill style from the palette, such as Solid.
To change the frame background color, click on the color next to Color and select the desired color from the color palette.
Legend properties are
edited in the Property Manager.
Back to Editing Legends
Next to Advanced Lesson 10 - Design Mode and Activating Boreholes