An unregistered raster log is depth registered immediately after importing the raster log. A registered raster log can be updated at any time by clicking the Register button in the Depth-register log field of the Log page in the Property Manager. The following images use the RasterPorosityLog.tif sample file. However, the steps explain the general depth-registration process.
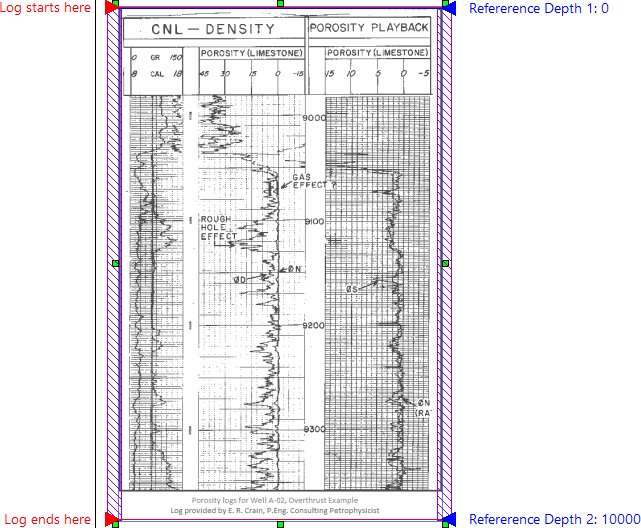
The default registration settings after an unregistered raster log has been added to the log pane.
Start depth registration for an unregistered raster log by clicking the Log | Create Log | Unregistered Raster command and importing a raster/image file. Update depth registration for a registered raster log by clicking Register in the Log page of the Property Manager. To depth register a raster log:
Click the top-left red arrow, labeled Log starts here, and drag the arrow to the desired start location for the log. You may wish to zoom in to the top of the log to precisely place the Log starts here arrow.
Click the top-right blue arrow, labeled Reference Depth 1: 0, and drag the arrow to the first known depth on the log. Generally this is the first labeled grid line. You may wish to zoom in to the top of the log to precisely place the Reference Depth 1 arrow.
Click the Log tab in the Property Manager if the Log page is not already selected.
Click the  next to Registration to expand the
registration properties.
next to Registration to expand the
registration properties.
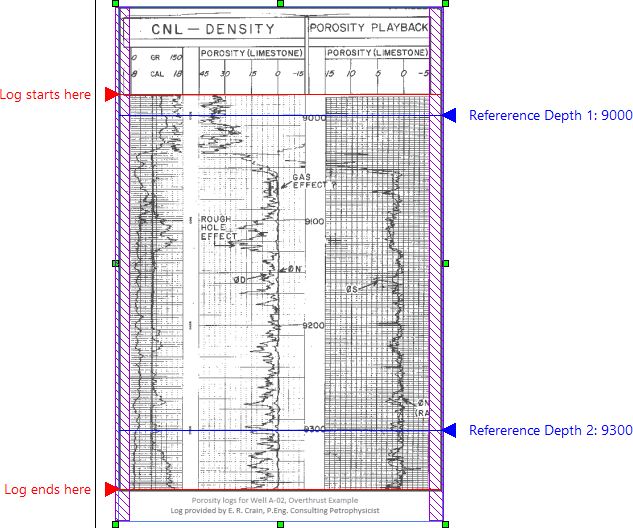
Type the known depth for the Reference Depth 1 arrow in the First reference depth field.
Click the bottom-left red arrow, labeled Log ends here, and drag the arrow to the desired end location for the log. You may wish to zoom in to the bottom of the log to precisely place the Log ends here arrow.
Click the bottom-right blue arrow, labeled Reference Depth 2: 10000, and drag the arrow to the last known depth on the log. Generally this is the last labeled grid line. You may wish to zoom in to the bottom of the log to precisely place the Reference Depth 2 arrow.
In the Registration page of the Property Manager, type the known depth for the Reference Depth 2 arrow in the Second reference depth field.
Hover the cursor over the left purple hatched area and drag the bar to the right to crop out unnecessary or undesired space from the left side of the log.
Hover the cursor over the right purple hatched area and drag the bar to the left to crop out unnecessary or undesired space from the right side of the log.
Press ENTER to save the depth-registration specifications for the raster log.
In the Log Registration Table dialog, specify a Hole ID, Table name, and Pre-clear setting.
Click Save.
If the registration is being changed and a layers mark table exists, the Layer Marks Table dialog is displayed.
Click Save to complete the depth registration.
The depth registration settings have been specified and depth registration
can now be completed by pressing ENTER.
A range table is created from the depth-registration settings. The image is cropped, if applicable, and displayed in the log pane. The raster log is now registered and can be used in cross sections and edited with the raster log properties. You can cancel the depth-registration process by pressing ESC, selecting a different object or view, selecting a command, or exiting Strater. When the depth registration is cancelled before the log has been registered, the default registration settings are used for the depth-registration. If you cancel the depth-registration mode on a raster log that has been previously registered, any changes are ignored and the depth registration is returned to the previous settings.
See Also