Multiple Boreholes in One Borehole View
Strater allows users to place data from more than one borehole onto a single borehole view. The concept and functionality is easy – users simply import data for multiple wells, add logs and then associate the new log with the appropriate borehole data.
A Strater project can include multiple boreholes with many data attributes:
-
You can import data from a single data file that has data from multiple boreholes into a project.
-
You can import data from multiple source data files with each data file including one or more borehole.
-
If importing data from multiple files, you also have the choice to import all the data together into one data table, or you can import each file into a separate data table.
-
You can import an LAS file for one borehole into one data table, and import another LAS file for a different borehole into a different data table.
-
You can easily change the borehole data source for a particular log to any borehole whose data is imported into the project.
For this example we use the file Mining Example-1.sdg, which is found in the Samples folder in the installation folder for the Strater software. The default directory is C:\Program Files\Golden Software\Strater 5\Samples.
-
Click the File | Open command or click the  button.
-
In the Open dialog, select the Mining Example-1.sdg file and click Open.
-
Click on the Interval data tab.
-
Scroll down and note the contents of the Hole ID column. There are two different borehole Hole IDs in this one data table: DH-1 and DH-2. There is no limit to the number of separate boreholes that can be part of a single data table.
-
Click the Mining: DH-1 tab.
-
Click the View | Display | View Properties command to view the borehole view properties in the Property Manager.
-
Notice the content of the Hole ID Filter field: DH-1, indicating that all logs in the view window are associated with the DH-1 Hole ID.
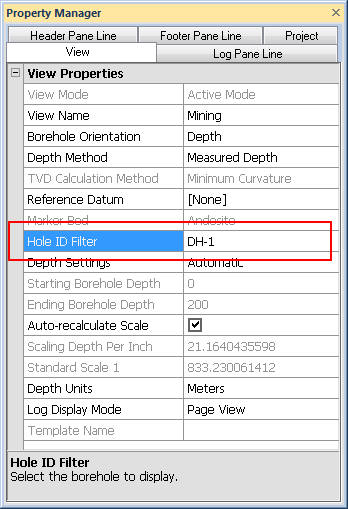
The Hole ID Filter on the View tab displays the Hole ID
of the borehole associated with the logs in the view window.
-
Let's change the borehole associated with one of the logs in the log pane from DH-1 to DH-2. Select the log Mo % in the view window or in the Object Manager.
-
In the Property Manager, click on the Base tab.
-
Click on the DH-1 text next to the Hole ID Filter option. A list is displayed that contains all borehole IDs found in every data table currently imported in the project. Select DH-2 from the list.
-
Notice how the data in log Mo % has changed:
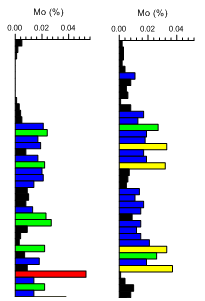
When you change the Hole ID Filter in the
Property Manager the log changes from the
original DH-1data (left) to DH-2 data (right).
-
Click the View | Display | View Properties command to view the borehole view properties in the Property Manager.
-
Look in the Hole ID Filter field:
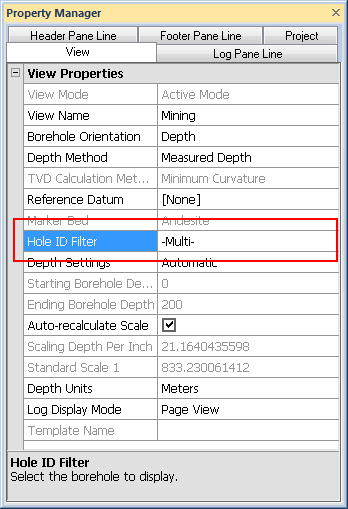
The Hole ID Filter field shows which borehole is associated with the currently
selected object in the log pane. If no object is selected, -Multi- is displayed.
-
The -Multi- term indicates that there are multiple boreholes whose data is part of the logs in this borehole view, and that no single object in the log pane is currently selected. -Multi- is shown whenever there is data from more than one Hole ID in any log currently displayed in the log pane.
Adding a Log from a Different Borehole to an Existing Project
Adding a log with a different borehole ID is simple. Strater makes no distinction to adding data from any borehole. As an example we will add data from a third borehole to this existing project.
-
This example uses the data file TUTORIAL 2.XLS, which is located in the Samples folder in the installation folder for Strater software. The default directory path is C:\Program Files\Golden Software\Strater 5\Sample.
-
Click the Log | Create Log | Zone Bar command or click the  command to add a zone bar log to the view.
-
Place the cursor on the right side of the log pane and click the mouse button.
-
In the Open dialog, select the Tutorial 2.xls file and click Open.
-
In the Specify Worksheet Column Definitions dialog, notice in the Data File Preview section that the Hole ID of the data is W17. Click Next.
-
In the Specify Data Type and Column Positions dialog, make sure the columns are specified correctly and click Finish.
The new zone bar log uses the data from the specified data file, which contains only one well: W17. The new zone bar log uses the W17 data.
See Also
Borehole View Properties